
Breaking in new hiking boots before embarking on your Kilimanjaro climb is essential for comfort, preventing blisters, and ensuring your feet are ready for the demanding trek. Start by wearing them around the house for short periods, gradually increasing the duration and intensity of wear, including short walks on varied terrain, to allow the boots to mold to your feet and identify any potential pressure points before your 2026 or 2027 adventure.
Why Breaking In Kilimanjaro Boots is Non-Negotiable
The summit of Kilimanjaro is an ambitious goal, and reaching it comfortably relies heavily on your footwear. New hiking boots, no matter how high-quality, are stiff and unforgiving. Without proper acclimatization to your feet, they can lead to painful blisters, hot spots, and even more serious foot injuries, potentially jeopardizing your entire climb. For trekkers planning their 2026-2027 expeditions, dedicating time to break in boots is as vital as physical training. It’s about creating a partnership between your feet and your boots, ensuring they work together harmoniously across diverse terrains and altitudes.
Understanding Your Kilimanjaro Footwear Needs
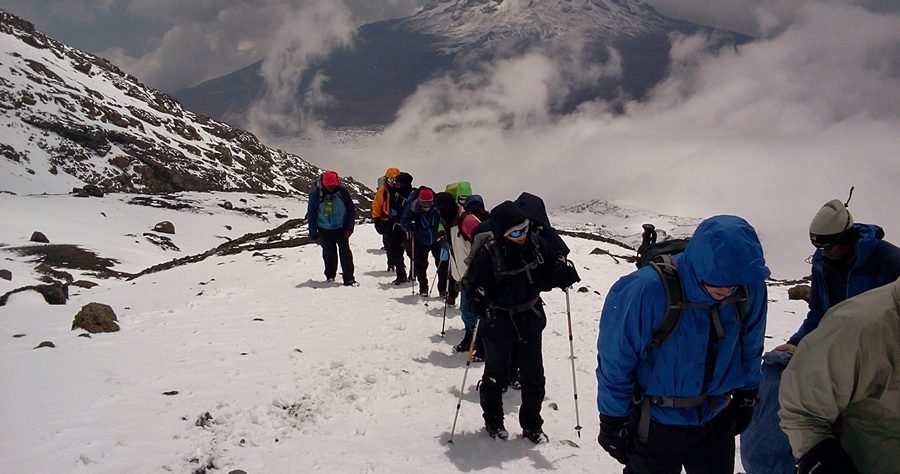
Before you even think about breaking them in, ensure you have the right boots for Kilimanjaro. The mountain presents varied conditions: from dusty trails at the base to rocky scree slopes in the alpine zone, and potentially icy or snowy conditions near the summit. Your boots should offer good ankle support, waterproofness, and excellent grip. Mid-weight to heavy-duty hiking boots are generally recommended over lightweight trail shoes for the main trek. Most routes, including popular ones like the Machame Route or Lemosho Route for 2026-2027 climbs, require boots that can handle sustained use over several days.
Key Boot Features for Kilimanjaro
- Ankle Support: High-cut boots are crucial for stability on uneven terrain and to prevent ankle rolls.
- Waterproofing: Essential to keep your feet dry from rain, mud, and snow, preventing blisters and maintaining warmth. Look for Gore-Tex or similar membranes.
- Durability & Protection: Sturdy construction with toe caps and heel counters protects against rocks and impacts.
- Traction: Deep lugs on the outsole provide grip on varied surfaces, from loose gravel to wet rock.
- Comfortable Fit: Even with breaking in, the initial fit is paramount. Ensure no pinching or excessive looseness.
The Step-by-Step Break-In Process
Breaking in hiking boots is a gradual process that requires patience. Rushing it is the surest way to end up with sore feet on the mountain. The goal is to allow the materials of the boot to soften and conform to the unique shape of your feet.
Phase 1: At Home Comfort (Week 1-2)
Start by wearing your new boots around the house for a few hours each day. Wear the type of socks you plan to use on Kilimanjaro (thick, moisture-wicking hiking socks). This initial phase helps you get accustomed to the feel of the boots and allows the materials to begin softening without the pressure of extended walking.
Phase 2: Short Local Walks (Week 3-4)
Once the boots feel comfortable indoors, begin taking them on short walks around your neighborhood or local park. Aim for 30-60 minute walks. Pay attention to any areas that feel tight, rub, or cause discomfort. This is the time to identify potential problem spots.
Phase 3: Increasing Duration and Terrain (Week 5-6)
Gradually increase the length of your walks to 1-3 hours. Seek out varied terrain similar to what you might encounter on Kilimanjaro, such as hills, uneven paths, or gravel trails. This phase is critical for testing the boots’ performance on different surfaces and inclines.
Phase 4: Longer Hikes and Load Bearing (Week 7-8)
If possible, undertake longer day hikes (4-6 hours) wearing your boots. If you plan to use a backpack on Kilimanjaro, start wearing a moderately weighted pack during these longer hikes to simulate the conditions you’ll face on the mountain. This helps the boots adapt to the added pressure and strain.
Addressing Common Boot Issues During Break-In
It’s rare for boots to break in without any minor issues. The key is to address them proactively.
Hot Spots and Blisters
If you feel a hot spot developing, stop immediately. Address it by applying moleskin or athletic tape to the area on your foot *before* a blister forms. If a blister does form, clean and dress it properly and give your feet a rest from the boots for a day.
Tight Areas and Pinching
Most modern hiking boots can be adjusted by lacing techniques. Experiment with different lacing patterns. For example, skipping eyelets in specific areas can relieve pressure on the top of your foot or around the ankle. Some boots might also benefit from targeted stretching by a professional cobbler, though this is less common with high-quality trekking boots.
Socks Matter: The Foundation of Comfort
The socks you wear are as important as the boots themselves. Always use moisture-wicking, synthetic or wool hiking socks. Avoid cotton, as it holds moisture and can lead to blisters. Consider liner socks as well, which can help reduce friction between your foot and the outer sock.
| Phase | Duration | Activity | Focus |
|---|---|---|---|
| 1: Home Comfort | 1-2 Weeks | Wear around the house | Initial feel, material softening |
| 2: Local Walks | 2-3 Weeks | 30-60 min walks on flat ground | Identifying initial pressure points |
| 3: Varied Terrain | 2-3 Weeks | 1-3 hour walks on hills/uneven paths | Testing grip and support |
| 4: Extended Hikes | 2-4 Weeks | 4-6 hour hikes, with pack | Simulating trek conditions, load bearing |
Boot Care and Maintenance During Break-In
Proper care ensures your boots remain in good condition throughout the break-in period and beyond.
Cleaning
After each wear, especially after walks on dusty or muddy trails, clean your boots. Remove mud and debris with a brush. For waterproof boots, a damp cloth is usually sufficient. Avoid harsh detergents that can degrade materials.
Drying
Never dry your boots near direct heat sources like fires or radiators, as this can damage the materials and adhesives. Remove the insoles and laces, and let them air dry naturally at room temperature. Stuffing them with newspaper can help absorb moisture and maintain their shape.
Conditioning (Leather Boots)
If your boots are primarily leather, they may require conditioning after cleaning to keep the material supple and prevent cracking. Use a leather-specific conditioner or wax, applying it sparingly according to the manufacturer’s instructions.
When to Consider New Boots or Professional Help
If, after several weeks of consistent breaking-in, your boots continue to cause significant pain or discomfort in specific areas, it might indicate a fundamental fit issue. For your 2026-2027 Kilimanjaro trek, it’s better to acknowledge this early. Consider trying a different model or brand. If you’re unsure, consulting with a reputable outdoor gear store’s boot-fitting specialist can provide valuable insights. They can assess your foot shape and recommend suitable alternatives or suggest minor adjustments.
Final Checks Before Kilimanjaro 2026-2027
A week or two before your departure for Tanzania, ensure you’ve completed your longest training hikes with the boots. They should feel comfortable and familiar. Pack a small repair kit that includes moleskin, athletic tape, and perhaps a needle and thread, just in case minor issues arise on the mountain.
Top Guide Adventures: Your Partner for Kilimanjaro Success
At Top Guide Adventures, we understand that a successful Kilimanjaro climb in 2026 or 2027 is built on thorough preparation. As a leading Kilimanjaro trekking operator, we offer expert advice on everything from optimal routes and acclimatization schedules to essential gear, including the critical importance of properly broken-in hiking boots. Our local guides, deep knowledge of the mountain, and personalized support ensure you have the best possible experience, allowing you to focus on the climb itself, confident in your preparation.
Conclusion: Paving the Way to the Summit
Breaking in your hiking boots for Kilimanjaro is a crucial, yet often overlooked, part of your preparation. By following a structured approach, listening to your feet, and addressing any issues promptly, you can ensure your boots become a reliable companion on your journey to the Roof of Africa. Proper boot preparation, combined with the right training and a reputable tour operator, sets the stage for an unforgettable and safe Kilimanjaro adventure in 2026-2027 and beyond. Don’t let ill-fitting boots hinder your ascent; invest the time now for a more comfortable and successful trek.
For personalized assistance with your Kilimanjaro climb planning, including advice on gear and logistics for your 2026-2027 trek, feel free to contact Top Guide Adventures. Reach us via WhatsApp at +255616946642 or email us at topguideadventures@gmail.com. For alternative inquiries, our backup email is info@topguideadventurestanzania.com. We look forward to helping you prepare for your incredible journey.
Check Availability for How To Break In Hiking Boots Before Kilimanjaro: A Complete Guide For…
Ready to compare dates, prices, and the best option for your group? Send the package name and travel month so the team can reply with a clear quote, availability, and what is included.
Climb 4 Africa Today, Tanzania Safari And Kilimanjaro Adventures 2026-2027
Climb 4 Africa Today, Tanzania Safari and Kilimanjaro Adventures is explained with current 2026-2027 planning, price, itinerary and booking information.
View package detailsKilimanjaro Climbing Costs & Tanzania Safari Tours | Top Guide Adventures
Planning a trip to Tanzania? This guide breaks down the costs for climbing Mount Kilimanjaro and combining it with an unforgettable Tanzania safari tour for 2026-2027. Learn about pricing...
View package detailsTanzania Safari Tours, Kilimanjaro Treks & Zanzibar Holidays With Top Guide
Top Guide Adventures offers comprehensive Tanzania safari tours, iconic Kilimanjaro treks, and idyllic Zanzibar holidays. Discover the best of East Africa with personalized itineraries...
View package detailsDiscount Tanzania Treks And Affordable Safari Packages In 2026-2027
Discover how to plan discount Tanzania treks and affordable safari packages for your 2026-2027 adventure. This comprehensive guide covers budget-friendly options for iconic destinations...
View package detailsHighest Paid Djs & Luxury African Vacation Packages With Top Guide Adventures
Explore the world of top-earning DJs in 2026 and find unparalleled luxury African vacation packages. Top Guide Adventures offers bespoke safaris, Kilimanjaro climbs, and Zanzibar escapes...
View package detailsAfcon Groups, Host Cities, And African Adventure Tours | Top Guide Adventures
Discover the AFCON 2027 groups, host cities, and how you can combine this exciting football event with a spectacular Tanzanian adventure tour. Top Guide Adventures offers tailored safaris...
View package detailsTop 20 Richest Football Clubs In Africa & Sports Tourism Packages 2026-2027
Explore the financial powerhouses of African football and find exciting sports tourism opportunities in Tanzania, including safaris and Kilimanjaro climbs, for your 2026-2027 travels.
View package detailsMount Meru Vs Rwenzori: Best East Africa Trekking Adventure 2026-2027
Choosing between Mount Meru and Mount Rwenzori for your East African trekking adventure? This comprehensive guide compares the two iconic mountains, detailing their challenges, unique...
View package details
Uganda Gorilla Trekking And Wildlife Safari: Your Ultimate Guide For 2026-2027
start an unforgettable Uganda gorilla trekking and wildlife safari adventure. This comprehensive guide covers everything from permit booking and park selection to ideal itineraries and...
View package detailsNo related package matches those filters. Clear one or more filters to see the other topic-matched options.